
To get rid of carpenter ants, locate the nest by following trails at night and checking damp wood near plumbing. Fix all moisture sources first, carpenter ants need damp wood to nest. Place borax-peanut butter bait along active trails and apply food-grade diatomaceous earth at entry points. Seal all cracks with silicone caulk. For colonies inside wall voids or structural wood, professional insecticide dust injection resolves the problem in 1–2 weeks.
Finding large black ants in your Toronto home is not just a nuisance, it is a structural warning sign. Unlike most ant species, carpenter ants do not eat wood, but they tunnel through it to build nests, and over a single damp Toronto summer, an established colony can hollow out enough of a joist or window frame to compromise it structurally.
Over eleven years of residential pest control across Toronto our team at Pest Removal Toronto has handled hundreds of carpenter ant infestations, from mild trail activity traced to a single damp window frame, to major structural damage hidden inside basement supports. This guide covers the full process: identification, severity assessment, natural treatment, baiting, chemical options when needed, and the prevention habits that stop them returning every spring.
- Why carpenter ants infest Toronto homes
- Signs of carpenter ants in your house
- Assessing severity, DIY vs professional
- Step 1: Find and confirm the nest
- Step 2: Cut off food and moisture sources
- Step 3: Natural and non-chemical methods
- Step 4: Carpenter ant baits and traps
- Step 5: Chemical treatments if needed
- Step 6: Repair damage and prevent re-infestation
- When to call a carpenter ant exterminator in Toronto
- Frequently asked questions
Why Carpenter Ants Infest Toronto Homes
Toronto’s climate creates ideal conditions for carpenter ant infestations. Wet springs, humid summers, and the freeze-thaw cycle that cracks mortar and wood every winter give carpenter ants exactly what they need: damp, softened wood that is easy to excavate and close to food sources.
- Moisture in basements and crawl spaces: Leaking pipes, poor drainage, and condensation around foundation walls soften wood and attract colonies. This is the single most common root cause in Toronto’s older housing stock.
- Decaying window and door frames: Older homes in Leslieville, The Annex, Parkdale, and East York frequently have original wood frames that have absorbed decades of moisture, prime nesting targets.
- Leaky roofs and soffit damage: Water penetrating rooflines saturates rafters and attic sheathing, areas rarely inspected until damage is visible.
- Tree branches touching the house: Carpenter ants nest primarily outdoors in tree stumps and dead wood. Branches contacting the roofline or exterior walls are direct highways into the structure.
- Spring swarming season: Between late April and June, winged reproductive ants (alates) swarm to establish new colonies. Seeing flying carpenter ants indoors is a strong indicator of an established parent colony already inside your home.
“One of the most common misdiagnoses we see is homeowners treating a carpenter ant trail with contact spray and assuming the problem is resolved. In a Roncesvalles home last spring, a client had done this for two years running. When we inspected, we found a well-established colony inside a basement support beam; the wood was almost entirely hollowed out on one side. The spray had killed foragers but never reached the nest.”
Signs of Carpenter Ants in Your House
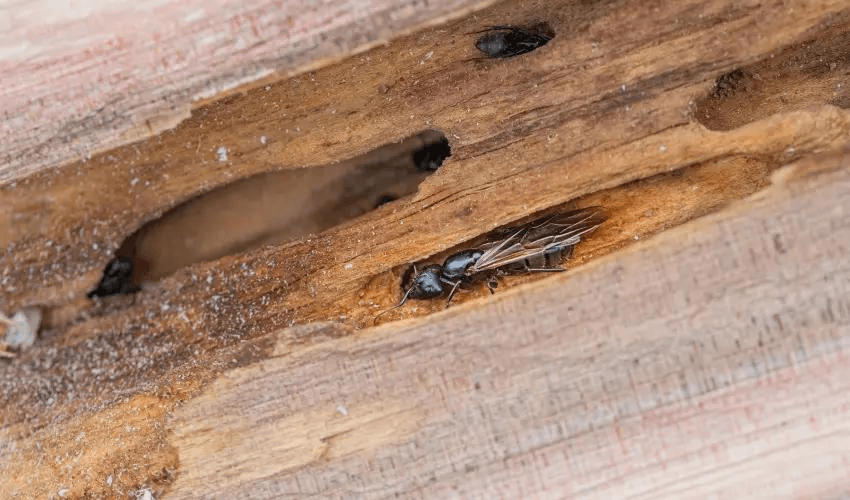
Visual signs
- Large black or reddish-black ants: Carpenter ants are 6–12 mm, noticeably larger than pavement or sugar ants. If you are seeing large ants near wooden structures, this is an immediate flag.
- Sawdust-like frass: Carpenter ants push excavation debris out of the nest. This frass looks like coarse sawdust mixed with insect fragments, found near baseboards, under eaves, or at the base of door frames. One of the most reliable indicators of an active nest.
- Smooth tunnels in wood: Probe a suspected area with a screwdriver, smooth-walled galleries running with the grain confirm an established, active nest.
Audible signs
A colony tunnelling inside a wall produces a faint rustling sound, similar to slowly crumpling paper. Most audible at night near walls containing plumbing. If you hear this near a bathroom or basement wall, investigate promptly.
Common indoor hotspots in Toronto homes
- Bathroom and kitchen walls, high moisture, frequent pipe runs
- Basement support beams and rim joists adjacent to exterior walls
- Window and door frames with deteriorating weatherstripping
- Attic rafters and roof overhangs near blocked gutters
- Anywhere a tree branch or ivy contacts the exterior
Assessing the Severity: DIY vs Professional Treatment
- Occasional sightings, no consistent trail
- No frass found indoors
- Entry from a single identifiable gap
- Activity began this season only
- No wood damage visible on inspection
- Outdoor nest locatable near foundation
- Frass found near structural wood
- Rustling sounds inside walls or ceiling
- Wood feels soft or hollow when tapped
- Repeated activity after DIY treatment
- Flying ants seen indoors in spring
- Ants in multiple rooms simultaneously
- Older home with history of moisture issues
Toronto-specific risk: Homes built before 1960, particularly High Park, Riverdale, and The Beach, have significantly higher carpenter ant risk due to original-growth wood framing that absorbs moisture readily. Lean toward professional inspection if your home fits this profile..
Step 1: How to Find and Get Rid of Carpenter Ant Nest
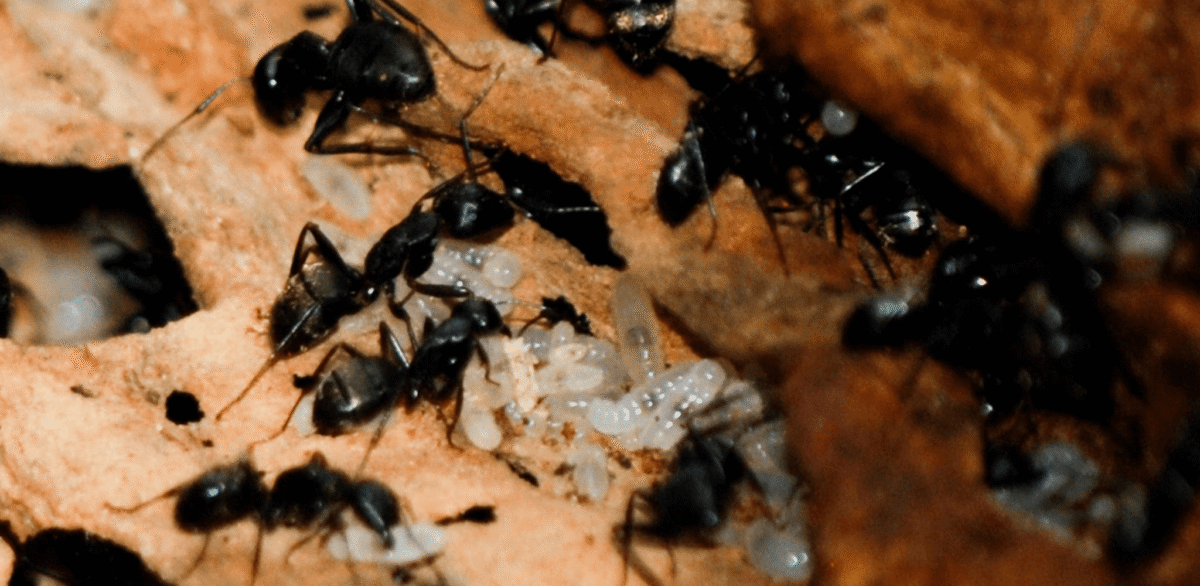
Finding the nest is the most critical step, and the one most DIY attempts skip. Treating trails without locating the nest is why carpenter ant problems persist for multiple seasons.
Carpenter ants are most active between 10pm and 2am. Red light is invisible to ants, follow forager ants from a food source backward toward the nest. Indoor trails most commonly lead toward bathrooms, basement walls, or areas near plumbing.
Use a screwdriver handle to tap beams, window frames, and baseboards. A hollow or papery sound indicates active tunnelling. Follow the hollow-sounding sections, the densest cavity is typically closest to the main nest chamber.
Priority areas: under bathroom vanities, around basement windows, rim joists near exterior walls, and under kitchen sinks. Look for frass piles, these are often the clearest indicator of exactly where the nest entrance is located.
Many indoor infestations have a satellite nest inside and a parent nest outdoors, in a tree stump, decaying fence post, or buried log near the foundation. Check tree stumps and any dead wood within 10 metres of the house. Finding and treating both is essential for permanent elimination.
Step 2: Cut Off Food and Moisture Sources
No treatment produces permanent results while the conditions that attracted the colony remain. Moisture is the primary driver; address it before or alongside bait deployment.
Indoor control
- Fix all leaking pipes and dripping taps, even minor drips soften surrounding wood over time
- Run a dehumidifier in the basement throughout the summer, targeting below 50% relative humidity
- Ensure bathroom exhaust fans vent outside, not into the attic
- Store all food in hard airtight containers and wipe under appliances monthly
- Repair or replace any soft, discoloured, or hollow-sounding wood found during Step 1
Outdoor control
- Trim all tree branches that touch or overhang the house. Carpenter ants follow these onto rooflines and into attic vents
- Keep firewood, mulch, and garden debris at least 30 cm from the foundation
- Clean gutters and downspouts each spring; blocked gutters overflow and saturate fascia boards and soffits
- Ensure ground slopes away from the foundation so rainwater drains outward
Natural and Non-Chemical Methods for Carpenter Ants
Borax-peanut butter bait
Carpenter ants prefer protein over sugar. A borax bait made with peanut butter is far more effective than the sugar-borax bait used for smaller species. Mix 1 tablespoon of borax with 3 tablespoons of peanut butter. Place small amounts on cardboard squares near active trails. Workers carry it back through trophallaxis, eventually reaching and eliminating the queen.
Key rule: Place bait beside the trail, not on it, ants avoid obvious obstacles in their path. Leave completely undisturbed for at least 7 days. Do not move it even if the activity appears low.
Diatomaceous earth at entry points
Food-grade diatomaceous earth along baseboards and entry points physically damages ant exoskeletons and causes dehydration. Safe around children and pets, leaves no harmful residue. Reapply after cleaning or rain, moisture neutralises its effectiveness.
White vinegar trail disruption
An equal-parts white vinegar and water solution sprayed on active trails erases pheromone signals. This does not kill the colony but slows forager activity while the bait takes effect. Wipe clean after spraying and reapply twice daily for the first week.
Targeted baiting is the most effective DIY approach. The goal is slow-acting poison that workers share before it takes effect, not contact killers that alert the colony.
| Bait type | Best for | Placement | How long |
|---|---|---|---|
| Gel bait (protein) | Indoor trails, tight spaces | Small dots every 15–20 cm along trail | 7–14 days; replace if dried |
| Granular bait | Outdoor nests, basement floors | Near nest entrance or trail | 7–14 days; replace after rain |
| Borax-peanut butter paste | All indoor situations | Cardboard squares beside trails | Refresh every 3–4 days |
Step 5: Chemical Treatment When Natural Methods Are Not Enough
Insecticide dust for wall voids
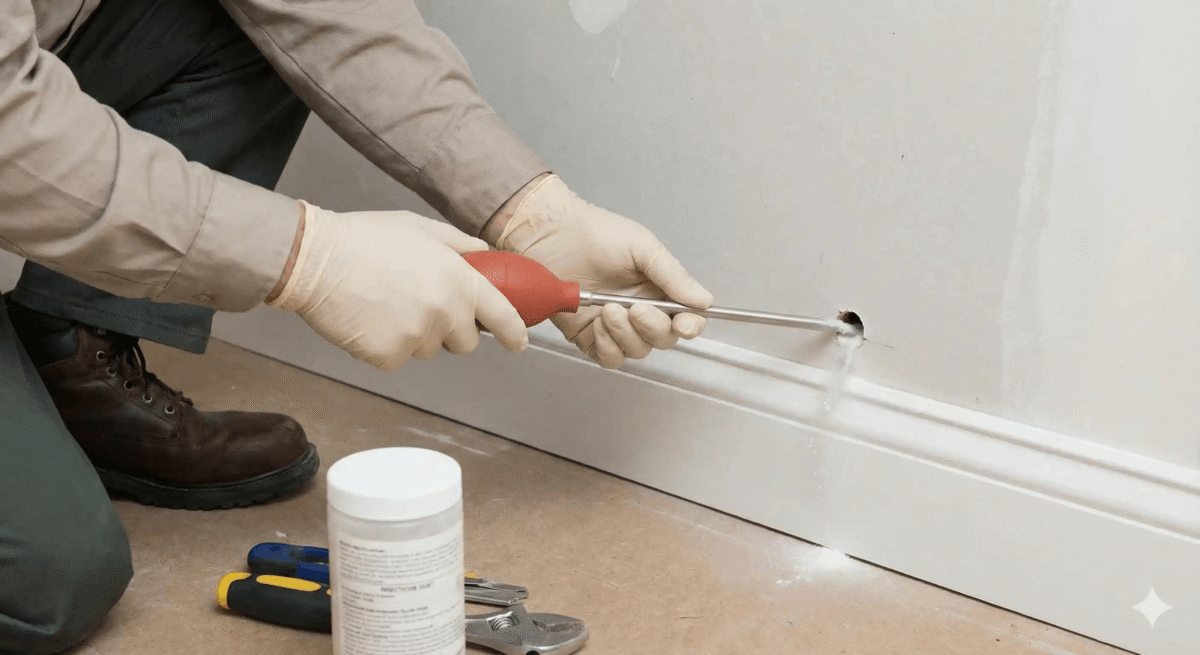
Carpenter ant-specific insecticide dust, typically containing deltamethrin or boric acid powder, injected into wall voids through small drilled access holes reaches the colony far more effectively than surface spray. The fine dust adheres to ant bodies and spreads through the nest via contact. This is the same method our technicians at Pest Removal Toronto use for most established indoor infestations.
Foundation perimeter spray
A residual insecticide applied around the exterior foundation perimeter and utility entry points creates a barrier that kills ants entering from outdoor nests. Apply in a 30–60 cm band along the foundation and re-apply after heavy rain. Follow all label instructions, avoid near water sources or storm drains, which violates Ontario environmental regulations.
Step 6: Repair Damage and Prevent Future Infestation
Repairing carpenter ant damage
- Minor tunnelling: Fill shallow galleries with epoxy wood filler after treatment is complete. Sand flush, prime, and paint to prevent moisture re-entry.
- Significant structural damage: Beams or joists with extensive hollowing require replacement. Have a structural engineer assess any load-bearing wood before deciding whether patching is sufficient.
- Treat exposed wood: Apply a borate-based wood preservative to any exposed or repaired wood in the basement and around window frames, this creates a long-lasting barrier against future carpenter ant activity.
Annual prevention for Toronto homeowners
- Inspect gutters every spring before the ground thaws, clearing blockages before the wet season, which prevents the most common moisture entry point
- Walk the exterior perimeter each April and re-caulk any cracked sealant around utility pipes, window frames, and where siding meets the foundation
- Check basement humidity in May and June, peak carpenter ant swarming season, and run a dehumidifier if humidity exceeds 55%
- Remove any dead or dying tree stumps within 10 metres of the house, the most common source of outdoor parent colonies that send foragers into Toronto homes
When to Call a Carpenter Ant Exterminator in Toronto
Carpenter ants are the pest category where professional treatment most clearly pays for itself. Their damage accumulates silently, and by the time it is visible, repair costs often far exceed years of professional pest control.
Contact a licensed professional from Pest Removal Toronto if any of the following apply:
- Frass near structural wood, rustling inside walls, or hollow-sounding load-bearing sections
- Flying ants appeared indoors in spring, almost always indicates an established parent colony inside the structure
- Infestation has returned after two or more rounds of DIY treatment
- You cannot locate the nest despite a thorough inspection
- Older construction with original wood framing and a history of moisture or plumbing issues
- Ants appearing simultaneously in multiple rooms or on multiple floors
Conclusion
Carpenter ants work quietly, by the time most Toronto homeowners notice them, a colony has often been active for at least one full season. Find the nest, eliminate moisture, deploy targeted bait, seal entry points, and repair affected wood. Give natural methods a full two weeks before escalating. If you see signs of structural involvement, frass near wood, hollow sounds, or flying ants indoors, do not delay a professional assessment. One inspection now is far cheaper than structural repair later.
FAQs
Most carpenter ant colonies can be eliminated within a few days to a few weeks, depending on the colony size and treatment method. Severe infestations hidden inside walls or damp wood may take longer for complete removal.
Carpenter ants tunnel through wood to build nests but do not eat it, while termites actually consume wood for food. Carpenter ants have narrow waists and bent antennae, whereas termites have straight bodies and antennae.
Yes, carpenter ants can return if moisture problems, rotting wood, or food sources remain around the property. Regular inspections and preventive treatments help stop recurring infestations.
Carpenter ants are not usually dangerous to humans or pets because they do not spread diseases. However, large colonies can cause serious structural wood damage if left untreated for a long time.